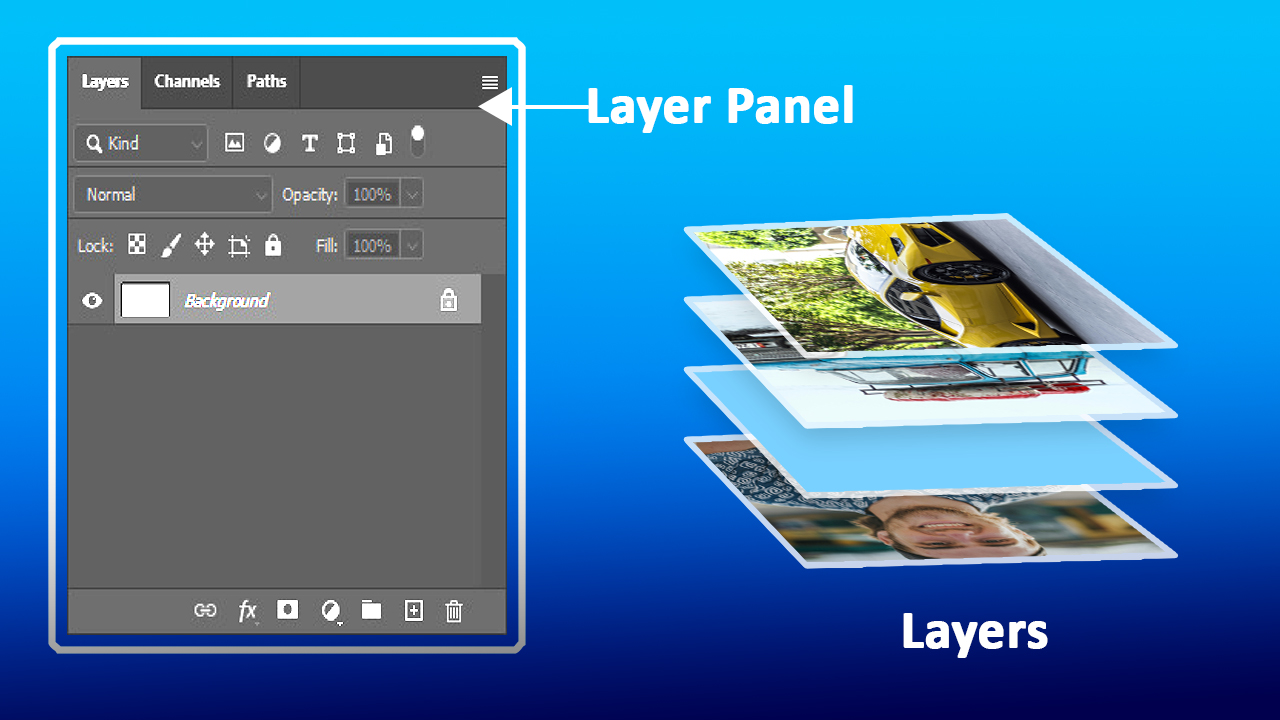
The layer panel is one of the most used panel in Adobe Photoshop. It has the most used settings, like the new layer option, blend mode, adjustment layers, layer mask and lots more. In this article, I will walk you through what all the icons and settings on the layer panel are used for.
The Concept of Photoshop Layers
Layers: Used for stacking image, or object on top of images. For better understanding, layers are like separate sheet of paper you can paint on or add your images to. it helps artist to work non-destructively.
How To Use The Layer Panels Settings
Delete Icon: Located at the right-end of the layer panel, use for deleting layers
New Layer Icon: Shortcut is (SHIFT + CTRL + N), comes after the "delete icon" use for creating new layers (sheet of paper)
Group icon: Shortcut is (CTRL + G), come after the “new layer icon” use to group two or more layers. To apply, select your desired layers by holding the (SHIFT) and click on them, click on the icon to group them or press the shortcut keys. To ungroup layers use this shortcut (SHIFT + CTRL + G).
Adjustment Layer Icon
Solid Color: Use to create fill in a non destructive way and the color can be change easily by clicking on it thumbnail twice.
Gradient: Use to create smooth blend between colors in a non destructive way. it also allows for gradient to be change by clicking on it thumbnail twice.
Pattern: Use to create patterns on image in a non destructive way. Also, patterns can be easily change by clicking on it layer thumbnail twice.
Brightness/Contrast: Use for adding brightness or contrast to an image.
Levels: Use for creating high contrast and brightness in an image. it's also use for decreasing contrast and brightness in an image and lots more (discuss in advance courses).
Curves: An amazing adjustment layer, used more by many artists to create contrast and brightness in an image. it's also use for decreasing contrast and brightness in an image and lots more (discuss in advance courses).
Exposure: Use for creating extreme brightness(exposure) or contrast in an image in one slide.
Vibrance: Use for increasing image color saturation. it has two sliders, one is “vibrance” use for fairly increasing or decrease color saturation in an image, the other is saturation” slider, use for saturating or desaturating an image color
Hue/Saturation: An amazing adjustment layer, use for changing image color, desaturating or saturating an image color (increasing the intensity of the color to appear more vibrant and vivid).
Color Balance: Use for creating balance between colors in an image.
Black and White: Use for turning a colored image into a black and white photo
Photo Filter: Use for creating color mood in an image
Channel Mixer: Use for adjusting the colors in an image.
Color Lookup: The best and most used adjustment layer by artists for creating mood in a photo.
Invert: Use for inverting an image color. What the invert adjustment layer basically do to image is it turn all the highlight in an image to black and all the shadows to white (you'll notice this changes in a black and white image).
Posterize: Use to reduce the number of colors in an image, giving the image a graphic appearance
Threshold: Use to convert a color or grayscale image into a high contrast black and white image. and it's non destructive.
Gradient: Use for changing an image color without the use of blend mode, and replacing it with two or more colors you choose.
Selective Color: Use for changing specific colors in an image.
Vector Mask Icon: Use for hiding an image or part of an image. it can also be used to create a smooth blend between images or object. To apply, select any layer of your choice, click on the mask icon, select the brush tool, paint on the image using black foreground color to “hide” part of the object, paint on the image using white foreground color to reveal hidden part of the image
Layer Style Icon: Use for adding effect to an object or image (effect such as drop shadow, outer glow and lots more).ut
Please, be reminded to practice the knowledge you've acquired here, if you want to master Adobe Photoshop. There's a saying which say “Practice makes perfect”. please practice, you're a genius.
In the next “Article” i will walk you through the blend mode with examples and not just studying. I'll provide you the image you we use, while we learned and become a master in Adobe Photoshop.
Told you Photoshop is a complete breeze if you have the right guide, comment below and sign up for more course.
Click Here to Learn More About Photoshop
Photoshop Courses | Top Creativites
Check out our store: we sell graphic template, 3D Models and lot's more
The home of digital products | Top Creativites
Comments (1)
Mikavat
You're no longer a photoshop beginner, you're already becoming a Photoshop Master, please comment "helpful" if you find this article really helpful